Over the last year we made the full switch to digital graphic recording in online meetings. However, we’ve been working digitally since 2010, and have long encouraged our clients recognize the value of digital graphic recording. It’s a flexible format for most any meeting, and allows us to leverage other visual assets with the click of a button or the swipe of a finger on an iPad.
Now that we’ve digitally graphic recorded in over seventy online meetings, we’ve curated an “ultimate guide” for ensuring graphic recording delivers the most value in virtual meetings.
Ultimate guide for using graphic recording in online meetings
- Find the right graphic recorder
- Do not wait until the last minute
- Identify the best times for using graphic recording in your agenda
- Align with the facilitator
- Ways of sharing the graphics during the meeting
- Test the technology ahead of time
- Consider images that are powerful vs. sensitive
- Invite interaction!
- Leverage the chat
- Have a strategy for capturing breakouts
- Walk through the graphics
- Using the graphics after the meeting
1. Find the right graphic recorder
We’ve written a couple of times previously about finding the right graphic recorder for your meeting. However, virtual meetings allow you to seek out a graphic recorder from anywhere in the world. You can find someone with expertise in your topics, skill at working in a certain format, or someone who can also offer complementary services such as facilitation, animations, or infographics.
Taking time to find the right graphic recorder for your meeting is the most important tip in this list, especially for online meetings. The graphic recorder needs to not only have the technical skills to work in virtual meetings, but the adaptability to manage technical glitches and is able to offer a range of formats for using graphics (see #12 below).
2. Don’t wait until the last minute
Because it’s important to find the right graphic recorder for your meeting, don’t leave it to the last minute to start your search. Graphic recorders are strategic partners that can advise the best way to engage with your audience, and how to integrate graphics with your agenda. Most of us have been in countless meetings and have seen what works well … and not!
Bringing a graphic recorder into your meeting is an investment that delivers the most value when it’s interactive for participants, helps build connections, or maps out complex systems (see #3 below).
3. Identify the best times for using graphic recording in your agenda
Assess your agenda and determine when graphic recording might enhance the dialogue and engagement.
Graphic recording is a highly effective tool for:
→ Group discussions (such as brainstorming sessions, vision/values conversations, SWOT or SOAR, report backs, etc)
→ Capturing different points of view and helping map a way to shared understanding
→ Presentations that include audience interaction or engagement; or presentations that provoke deeper thought from the audience
→ Capturing complex themes or ideas and linking them to a larger system or relationship
→ Making connections across a multi-day event, weaving together key themes and ideas
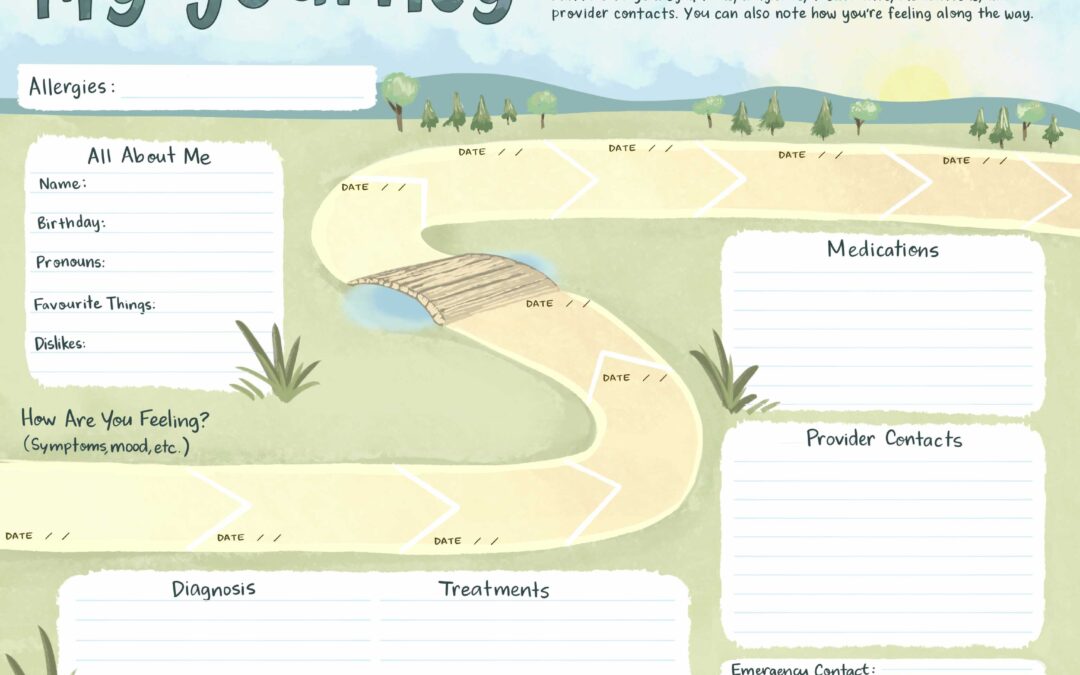
In addition, consider the level of detail needed in the graphic recording, and how it might link to a bigger theme. Graphic recording can be a detailed capture of the content, or it can weave together high-level themes and key ideas in a knowledge wall format… or a blend of both!
Below: (Click to view full size) A knowledge wall graphic recording that weaves together themes from an all-day virtual event.

4. Align with the facilitator
If there’s a facilitator leading the meeting, the graphic recording can align with any activities the facilitator is having the group work through, or methodologies the facilitator is using.
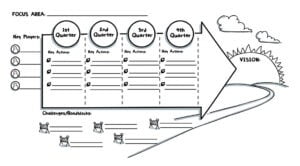
For example, if the facilitator has the group develop an action plan for each quarter of the next year, the graphic recorder might prepare a visual template ahead of time with a structure for Q1, Q2, etc.
In order to align with the facilitation, it’s important the graphic recorder and facilitator connect before the meeting to sketch up ideas. This ensures the graphic recording dovetails with the facilitation and enhances the group’s work.
5. Ways of sharing the graphics during the meeting
There are five ways of sharing graphic recording in an online meeting. The right format depends on the agenda and what works best for the audience. Keep in mind that the more you show the graphic being drawn, the more it will enhance the dialogue and people’s connection to the visuals.
Screen share
The simplest way of sharing the graphic recording is through screen share. The graphic recorder screen shares the graphic at pre-determined times, or when cued by the meeting host, or the graphics can be shared throughout the entire meeting. Screen sharing the graphic is the highest definition (HD) way of viewing the graphics, compared to the other options listed below.
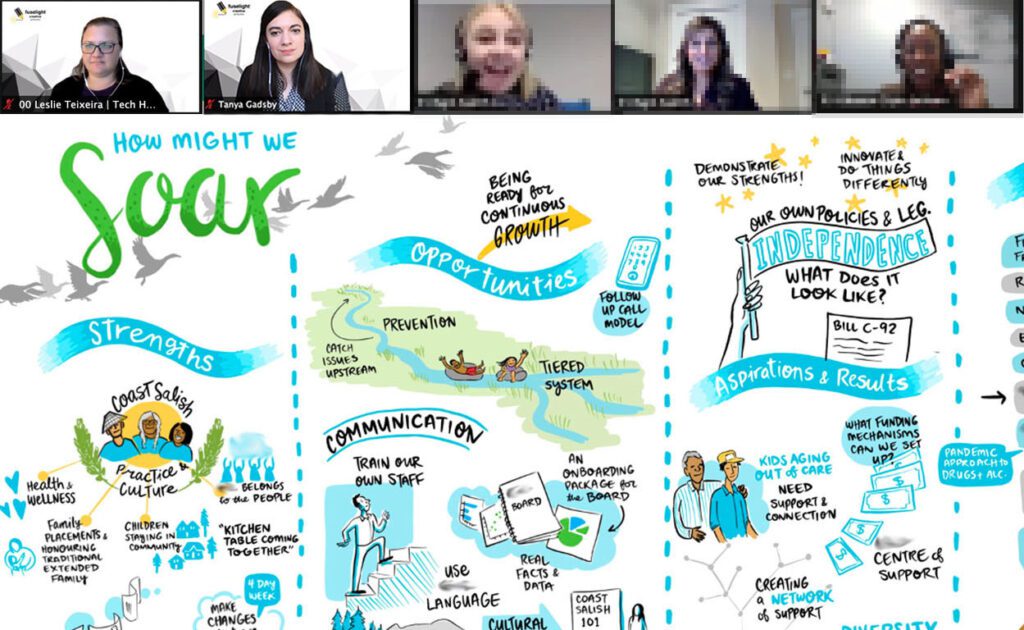
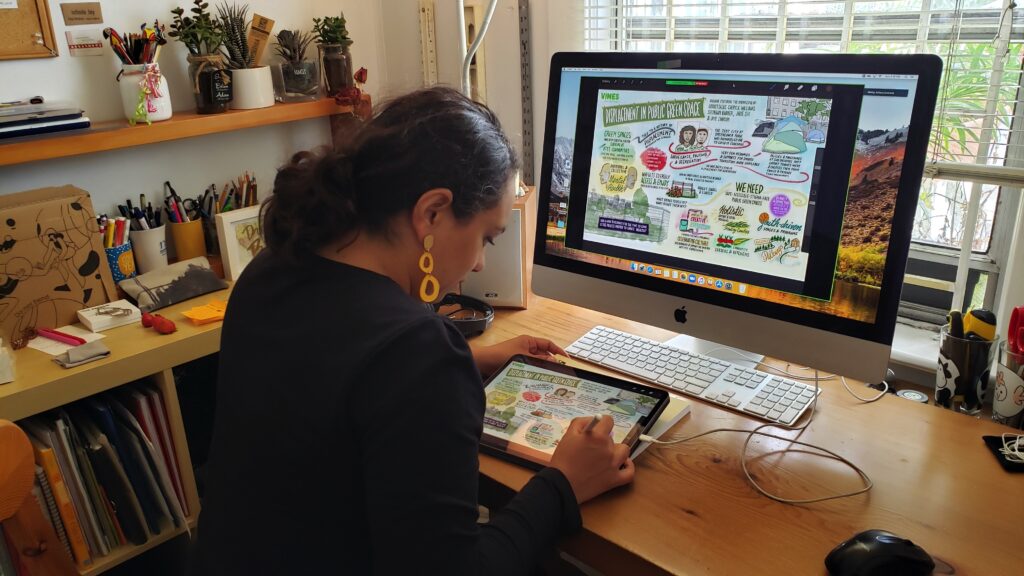
Below: Adriana drawing on an iPad during a Zoom meeting.
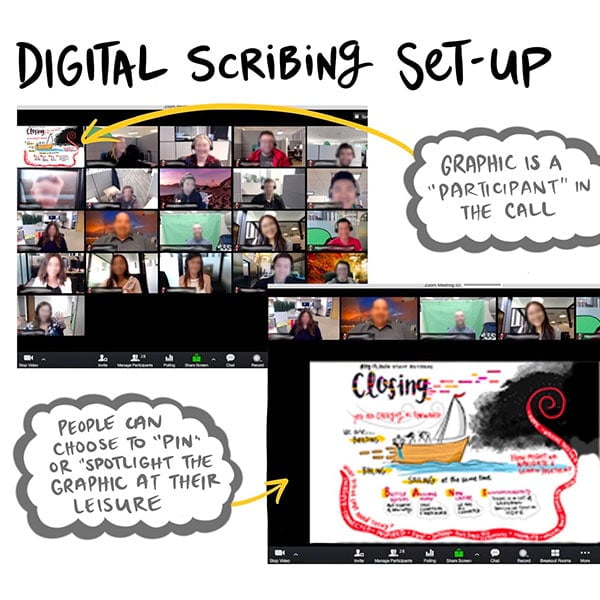
Video feed
The graphic recording is a “participant” in the meeting, and people can check it out at their leisure by pinning the video feed to their screen. This doesn’t interrupt the meeting, or change the view for other participants. However, the video feed is lower definition (particularly in large meetings), so the graphic may appear slightly fuzzy or difficult to read smaller details.
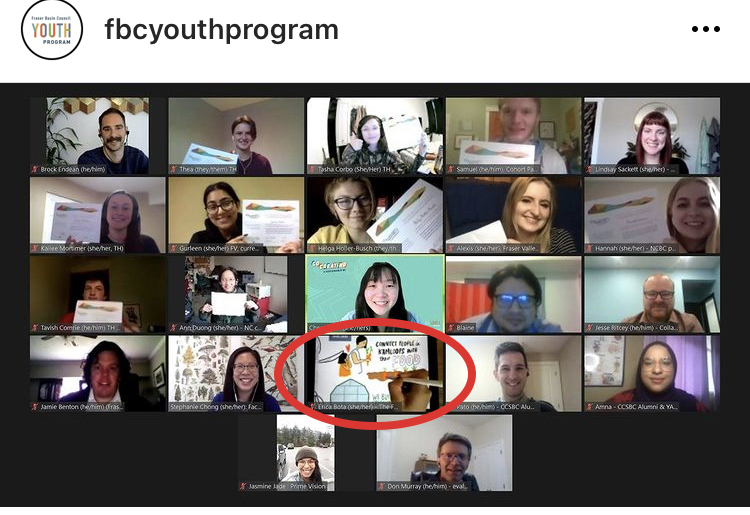
The graphic recording can also be displayed in an overhead view so you can see the graphic recorder at work. Below is an example of team mate Erica scribing in an overhead view for the group.
Live stream
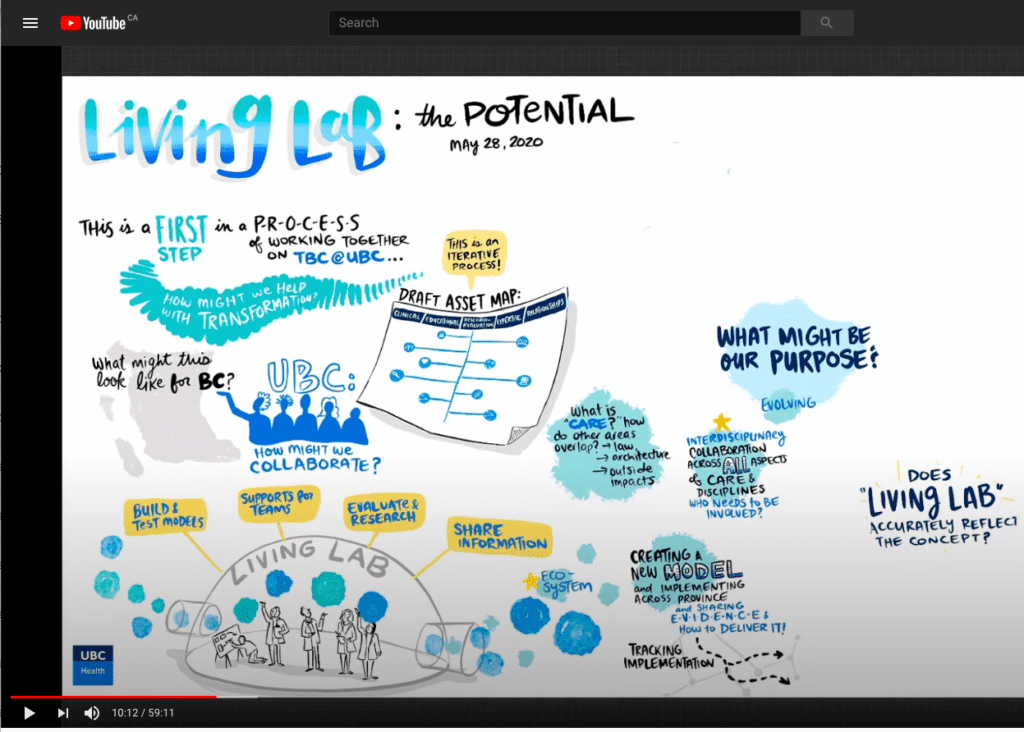
At large events, or those with a lot of presentations, the graphic recording can be shared through a private YouTube live stream. People check out the graphic at their leisure, and they can “rewind” through the graphic if they want to see a particular section being drawn. This is effective if the graphic recorder switches to a new page, or zooms in close on a section.
Live streaming is often a high definition way of sharing, depending on each individual’s internet connection.
Below: Screenshot of a live stream of a graphic recording for UBC Health.
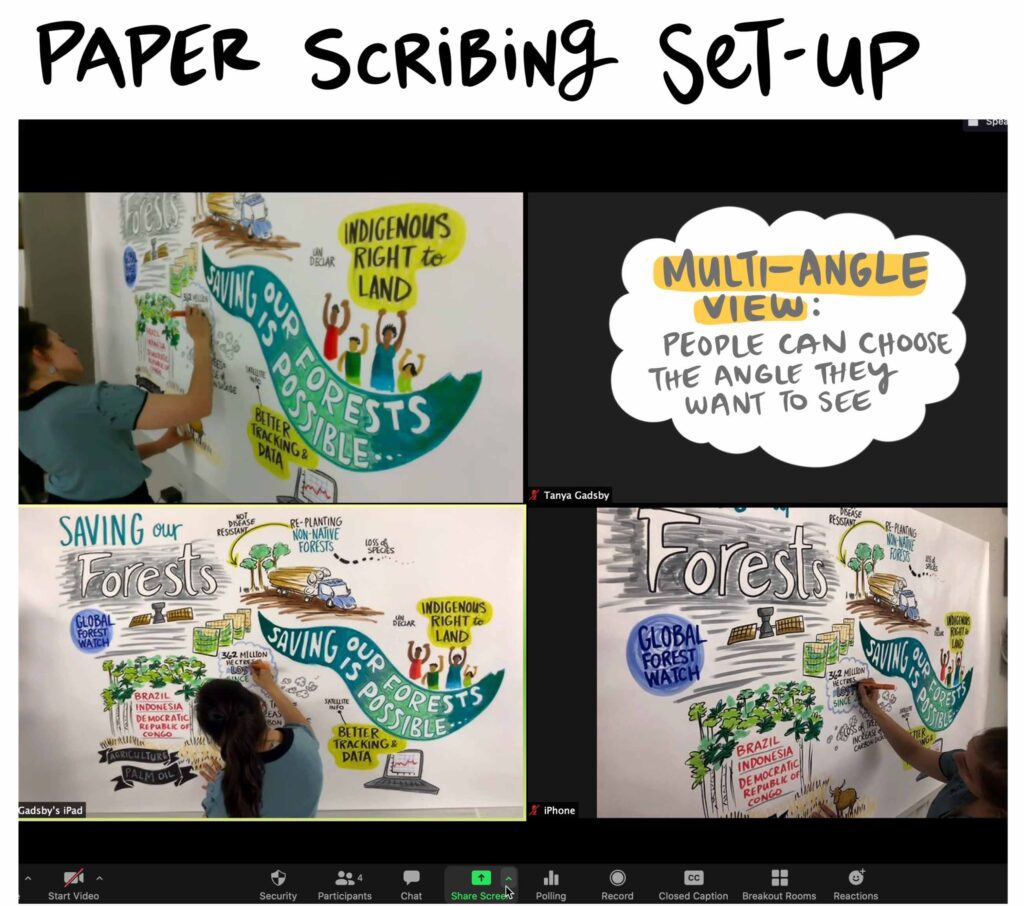
Paper Graphic Recording
If you’re wanting a hands-on feel to the graphics, scribing on paper is still an effective way of capturing the discussion. By logging in with multiple devices, the graphic recorder can set up a multi-angle view of the graphic. This brings a more three dimensional feel to the graphics, as people can choose to view different angles. The graphic recorder can also do a video walkthrough of the large graphic with the group.
Using analogue materials (markers! paper!) to create the graphic is a refreshing change from all the digital assets people are using in online meetings. The large poster can be on display in a shared workspace, or be sent on a “road show” between people’s homes.
Hybrid in-person / online events
Hybrid events are a combination of in-person participants and online participants.
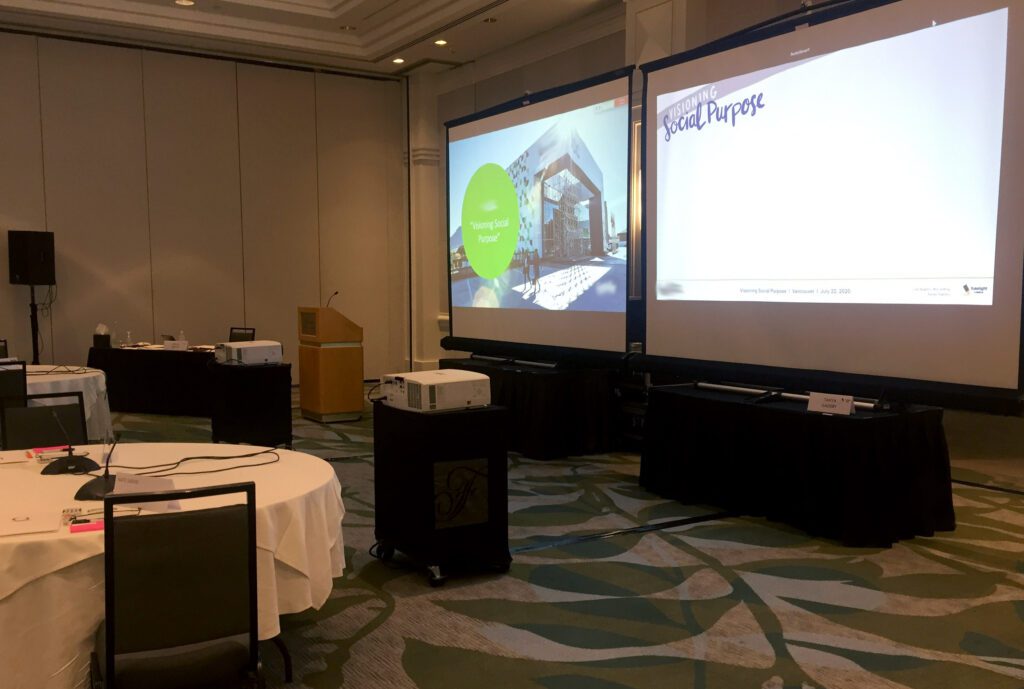
In the summer of 2020, COVID-19 restrictions in Vancouver allowed for small socially distanced meetings. Our graphic recorder connected to an in-person meeting by joining through Zoom. The facilitators, Q Workshops, projected the digital graphic recording for the group to see as it was being drawn. Each table in the room had a microphone so the graphic recorder could follow the discussion.
People who weren’t able to travel also joined the meeting by Zoom and had a view of both the graphic recording and the room. People could also view the graphic on their laptops, as it was also live streamed through a private YouTube link.
This hybrid in-person / virtual format allows an in-person event to use a graphic recorder who may not be local to the area, but has valuable expertise in the topics. It also cuts down on travel costs. However, this format requires a technically savvy facilitation team.
Graphic recording set up on screen for an in-person event, with the graphic recorder connected in virtually. Photo credit: Q Workshops
6. Test the technology & have a backup
Test technology
Once you’ve settled on a format and strategy for using graphic recording in your online meeting, set up a time to test it a week or a few days before your event. It’s important the graphics are sharable in your meeting platform and clear and easy to read.
If the graphic recording needs to transition between breakouts or be on display at key times, do a run through of those transitions, including any audio cues the graphic recorder needs to listen for.
Have a backup
Don’t get disrupted by power outages cutting out your internet! Uninterruptible power supplies (UPS) are power bars with a back up battery. You’ll stay connected to the internet for anywhere from thirty minutes to multiple hours, depending on the UPS.
It’s also wise to check if the graphic recorder has a second device they can switch to if their first device fails, or another back up plan for capturing content if they’re booted from the meeting.
7. Consider images that are powerful vs sensitive
Before the meeting, have a conversation with your graphic recorder about images that are powerful versus those that are cliché or sensitive in your area of work.
This is important in meetings addressing complex subjects like mental health and addiction, palliative care, racial justice, inequity, and health & human rights. But it also applies for any organization or topic; there are clichés or insensitivities found in every industry. If the graphics are going to engage people and deepen understanding, they need to accurately and powerfully capture it.
8. Invite interaction!
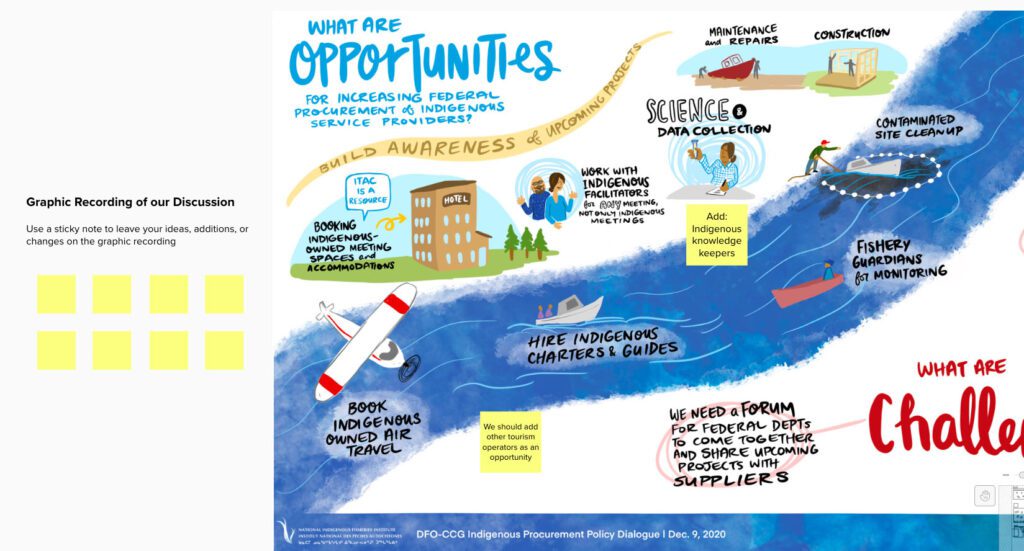
The graphics shouldn’t be “untouchable pieces of art.” During the meeting, don’t ignore the graphic recording! Remind people of the purpose, and that these graphics are built collaboratively. Make time in the agenda for people to provide feedback and changes. You can do this during the meeting by inviting verbal or chat feedback, or afterward by uploading the graphics to a collaborative board such as MURAL so people can leave digital sticky notes directly on the graphics.
Graphic recording uploaded to MURAL for the audience to provide feedback, additions, and changes.
9. Leverage the chat
Graphic recording doesn’t have to only be about listening to the verbal conversations in the session. The chat is often a parallel dialogue, full of ideas, reactions, and insights. In some meetings, we’ve focused mostly on capturing content from the chat because the conversation was so rich.
In other meetings, we’ve captured content from verbal dialogue, and afterward woven in the chat content so the graphics were a blend of both.
The chat is also an opportunity to gather feedback, additions, or changes to the graphics (see #8 above).
10. Have a strategy for capturing breakouts
There are a variety of ways of capturing simultaneous breakout discussions in a graphic recording. Below are a few examples:
→ Have groups report back their top 2-3 ideas from their breakout when they return to the main session
→ Set up a shared Google doc for groups to take notes. The graphic recorder can peek at what groups are discussing, and start building a visual
→ The graphic recorder can hop between breakouts to capture a few highlights from each
→ Assign designated listeners in each breakout to capture notes and filter them back to the graphic recorder
Having a plan ahead of time will ensure we don’t miss these rich conversations!
11. Walk through the graphics
At the end of the meeting, reserve 5-10 minutes for the graphic recorder to walk through the graphics with the group. Closing the session this way gives the group a moment to reflect on the content, and gives people an opportunity to re-engage with the ideas, provide feedback, or ask questions. The graphic recorder can also explain the purpose behind the image choices they’ve made.
12. Using the graphics after the meeting
You’ll get more value from the graphic recording if you’ve thought of how you want to use it after the meeting.
Immediate access to the graphics after each session
We are big believers that the graphics should be ready as soon as possible after the end of the meeting so the audience can review and share them. We always aim for within 1-2 hours of the end of a half-day or full-day meeting, depending on the complexity and pace of the discussion.
A communication tool
The graphic recordings are a powerful communication tool that can be used to further dialogue, gather more feedback, or share the work underway:
→ Incorporate the graphics into a visual package with presentations and reports from the meeting
→ When preparing more formal reports, the graphics can serve as a “Visual Executive Summary” alongside written executive summaries
→ Mail out print versions as a tangible artifact from the meeting (frame them for an extra special thank you to presenters!)
→ Walk through the graphics at future meetings: a visual way of walking through the content with teams, or anchoring discussions in narrative journey maps.
→ Gather more feedback (see the MURAL example in #8 above) and update the graphics over time
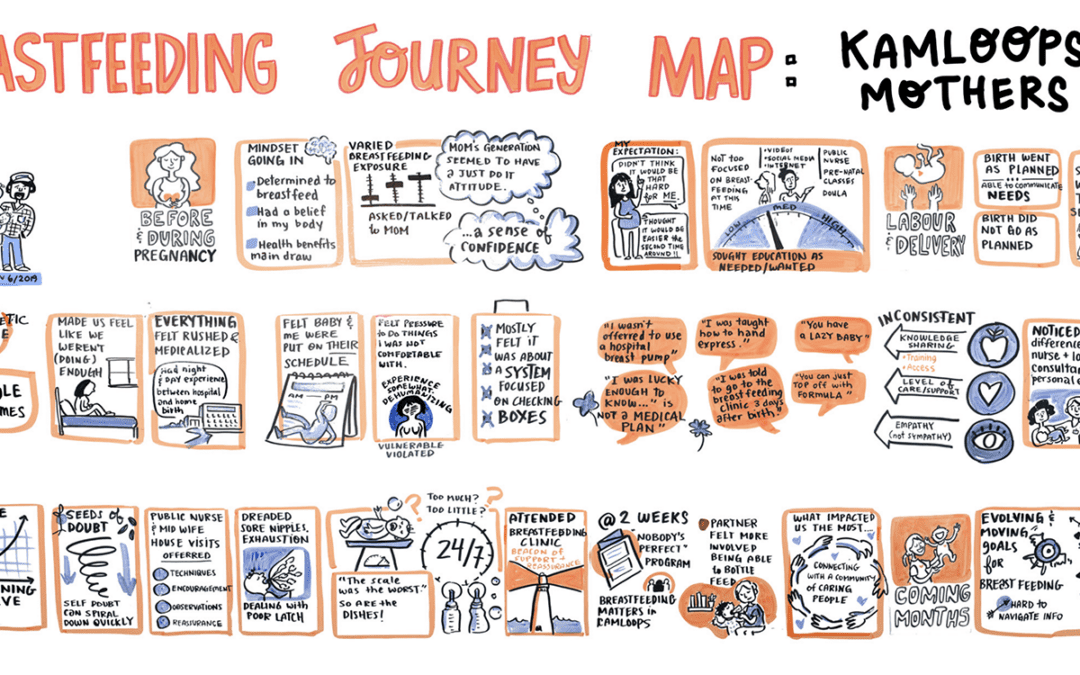
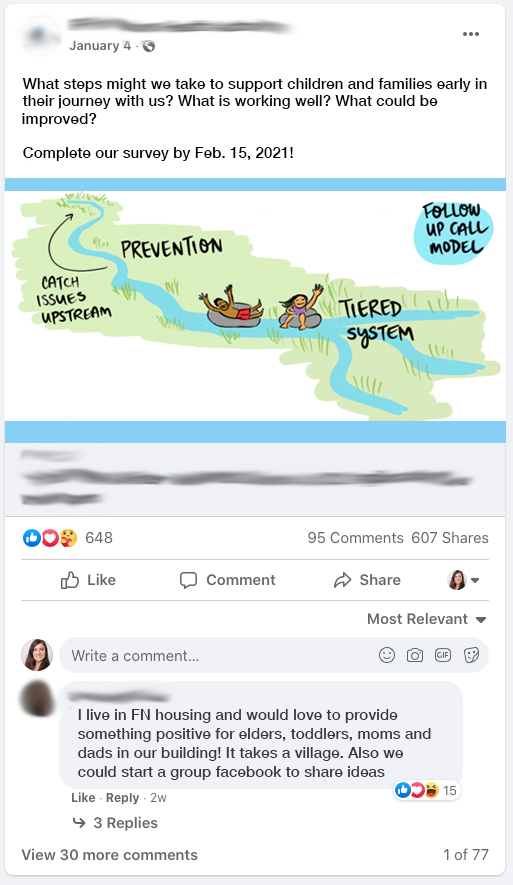
→ Share excerpts on social media — rather than just posting the entire graphic on social media, identify snippets of the graphic that are conversation starters and encourage online discussion. For example, the snippet below was pulled from the graphic recording shown at the top of this article, and posted on the client’s Facebook to generate dialogue on strategies for upstream support:
→ set up the graphic recording as a company-wide screen saver so the content is in front of people throughout the year
→ the graphic can be printed in monthly calendars, mugs, thank you cards
MURAL for gathering feedback
Upload the graphic recording to an interactive board, such as MURAL. Your audience can review the graphics and use digital sticky notes to leave thoughts, reactions, or additions. Check out this example board and how it can facilitate dialogue not only during a conference, but 24/7.
Making the graphics “clickable” and interactive
Graphic recordings can be made “clickable” so viewers see additional information, images, and data. This is excellent way of annotating graphic recordings with resources so they become a hub of information. Check out this example that we demo in the video below.
Augmented reality: creating a physical experience for people
We really miss in-person graphic recording and the impressive size of the graphics (often 8ft long posters!). So we’ve replicated that experience by uploading digital graphic recordings to augmented reality. People can do a “gallery walk” of the graphics in their homes or offices — a more physical experience than viewing on a laptop. Check out an example here (download the Sketchfab app to view in AR).
Icons for use in other materials
The icons in a graphic recording can be isolated as separate images. These are great for using in other materials, such as Power Points, websites, posters, thank you cards, or learning materials.
Time-lapse video
Digital graphic recordings can be recorded in real time as they’re being created. This time-lapse video of your concepts being drawn can be edited with voice over or clips from your virtual meeting. A memorable summary of the event!
Connect with us!
Planning an event? Whether you’re in early stages, or need support asap, we’re always happy to share ideas on how best to use graphic recording in online meetings. Reach out and let’s chat!