When a meeting has multiple breakout groups, flip chart note taking can enhance and guide group discussions. During a breakout group discussion, one person is usually assigned as the “recorder,” and he or she rarely has a graphic recording background… so the notes might be illegible, scattered, or too lengthy. The basic fundamentals of graphic recording can enhance flip chart note taking or the use of large visual templates when facilitating discussions. Whether you’re a facilitator wanting to improve your flip charting, a volunteer scribe, or a sketch-noter… you don’t have to be an artist to take effective notes!
By implementing a few basic techniques, your flip chart note taking will improve in legibility and organization, and therefore facilitate better group discussions. Check out the Cheat Sheet at the end of the post, which is free to download!
The tips below are ordered from the most basic improvements you can make, to more sophisticated techniques.
Legible Writing
Clear writing is essential, although it’s often undervalued in the interest of speed. But the group needs to quickly read the ideas you’re putting up on the flip chart and build upon them – sloppy handwriting makes this difficult!
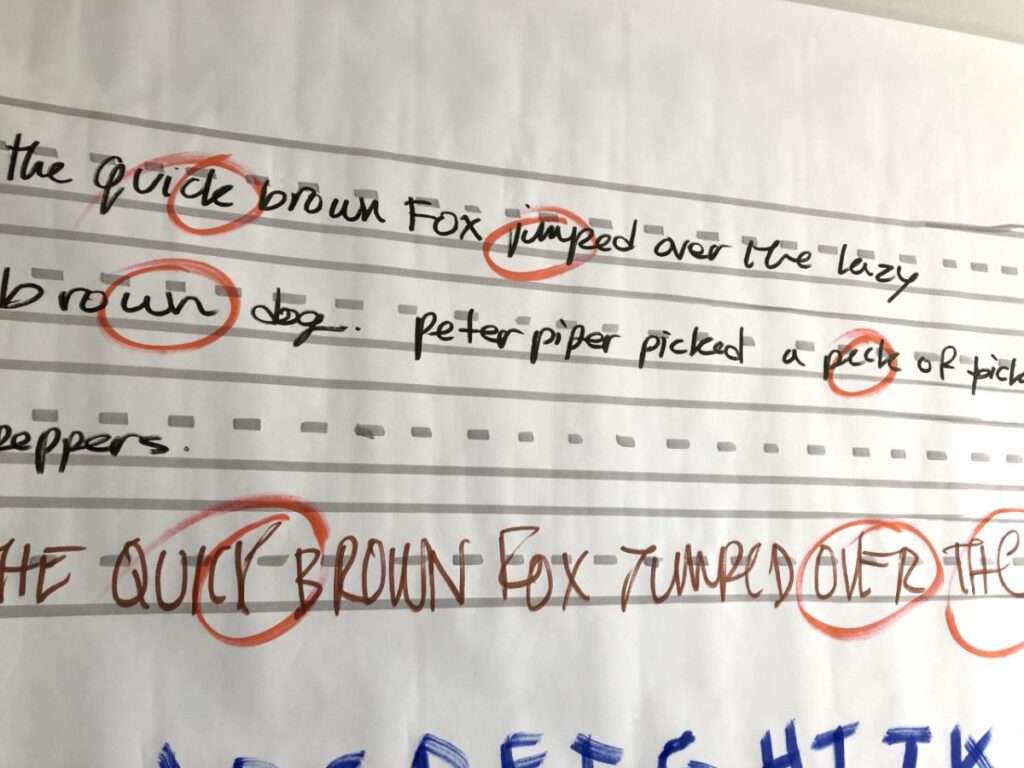
Improving your writing only happens through repetition and practice with the exact tools you would be using: large markers, flip chart paper, and in a standing position at a wall or flip-chart.
Start by writing a simple phrase at your quick handwriting pace. Then step back and analyze what needs improvement. Is it how close your letters are? Illegible m’s and n’s? Focus on what needs improvement and start slow – you want to embed the right gestures into your muscle memory before speeding up!
Heather Martinez, a colleague of mine, specializes in lettering and legibility and offers a wealth of resources on her site.
Planning Space
Always keep an eye on the time allotted for the discussion so you don’t run out of paper space! This is especially important when working with a large visual template. It can help to divide up your space by lightly penciling lines based on 15- or 20-minute blocks of time so you keep within certain boundaries.
Below is an example of our graphic wall set up and ready for a fast-paced graphic recording. We often lightly pencil in lines to separate blocks of time and ensure we utilize the space effectively. (note: the time blocks are emphasized in the image for demonstration purposes; they’re not visible to participants)

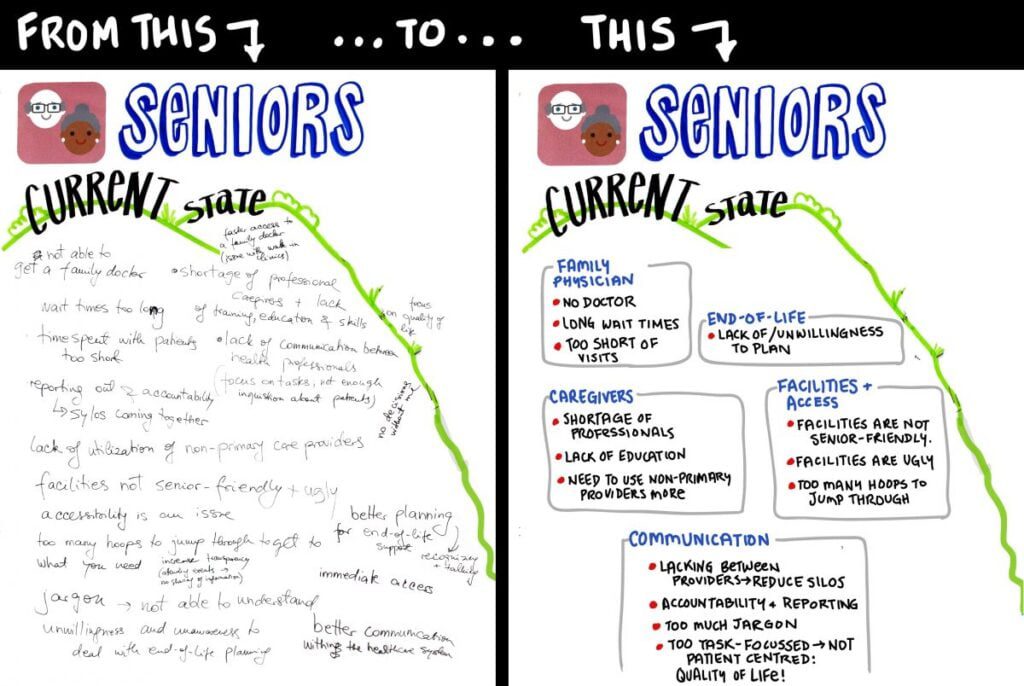
Hierarchy of Text & Colour Use
Organizing a discussion by topic will help participants quickly scan and understand main concepts and the details under each.
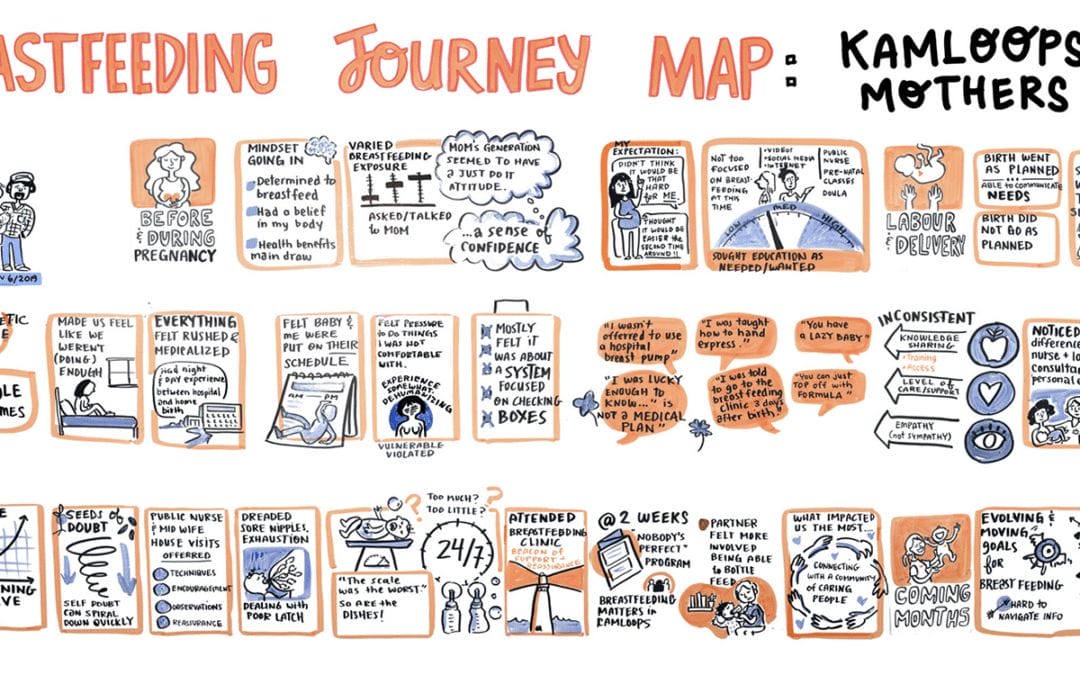
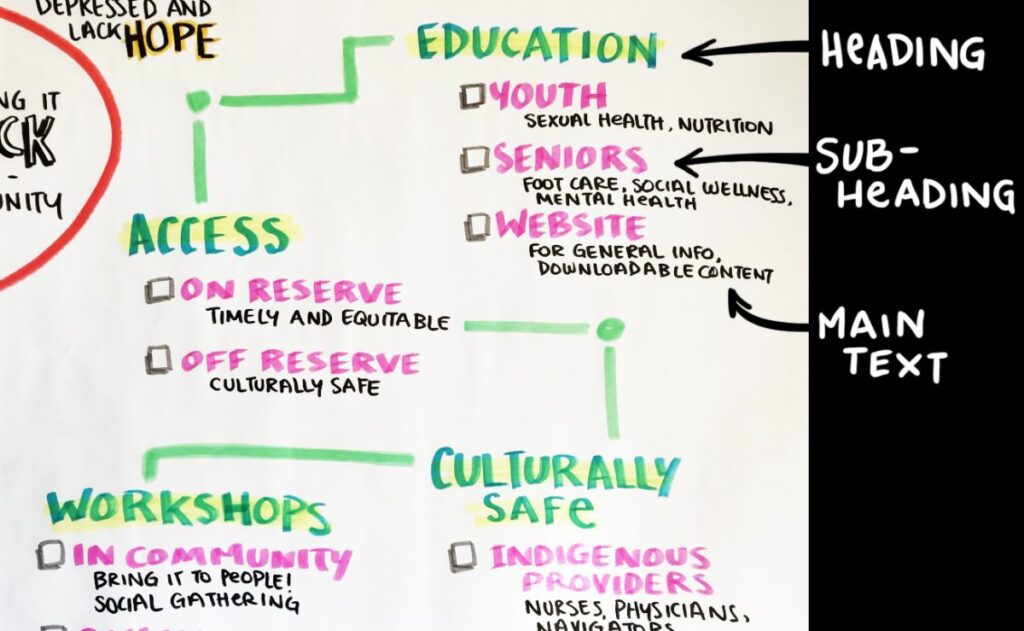 Excerpt from a graphic recording where ideas were quickly captured and organized in a hierarchy.
Headings – these are the general topics that come up in a conversation. For example, a discussion about a new company website might include these headings: Budget, Launch Date, Design, Communication, etc. Headings are best written in all-caps and in bold colours such as blue, green, red, or purple.
Sub-Headings – using the new website example, we might have sub-headings under Communication, such as: Social Media, Launch Day Promotion, Internal vs. External, etc. Sub-headings can be a contrasting colour from the Heading, or the same colour as your main text, but written in a larger font so it stands out from the main text.
Main Text – the main text is where you’re capturing more details under each sub-heading. For example, under the sub-heading “Launch Day Promotion,” there might be a discussion about give-aways, discounts, and social media channels. Black is a good standard for your main text. Ensure it’s the smallest size text you use, but still legible from a distance.
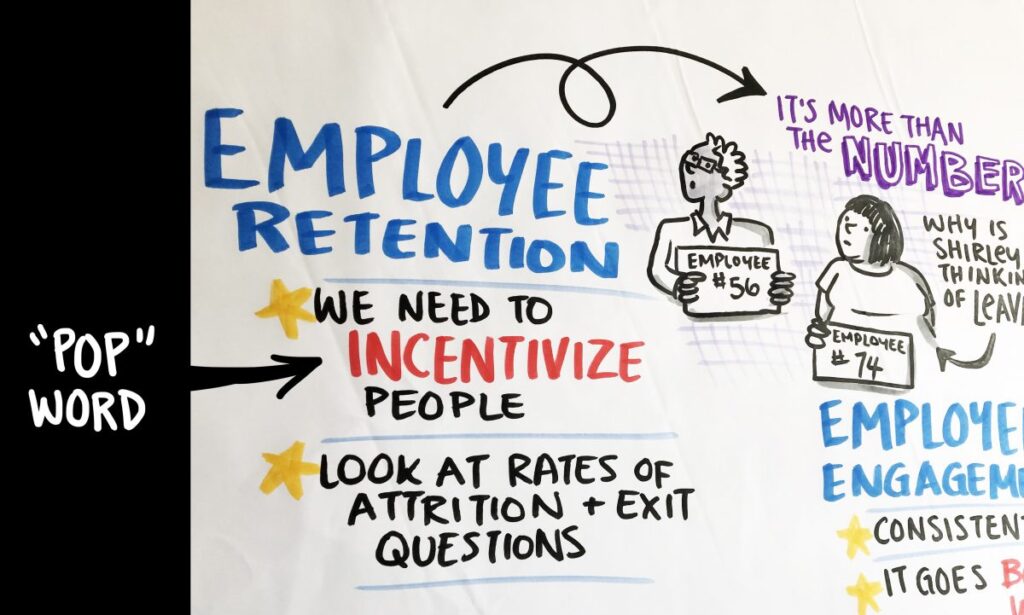
“Pop” or Highlight Colour – If you want, you can also choose a “pop” colour for making a particular idea stand out. This should contrast with the Heading, Sub-Heading, and Main Text, and will help emphasize ideas that really resonate with the group so they stand out at a glance.
Dividers and Bullets
Bullets
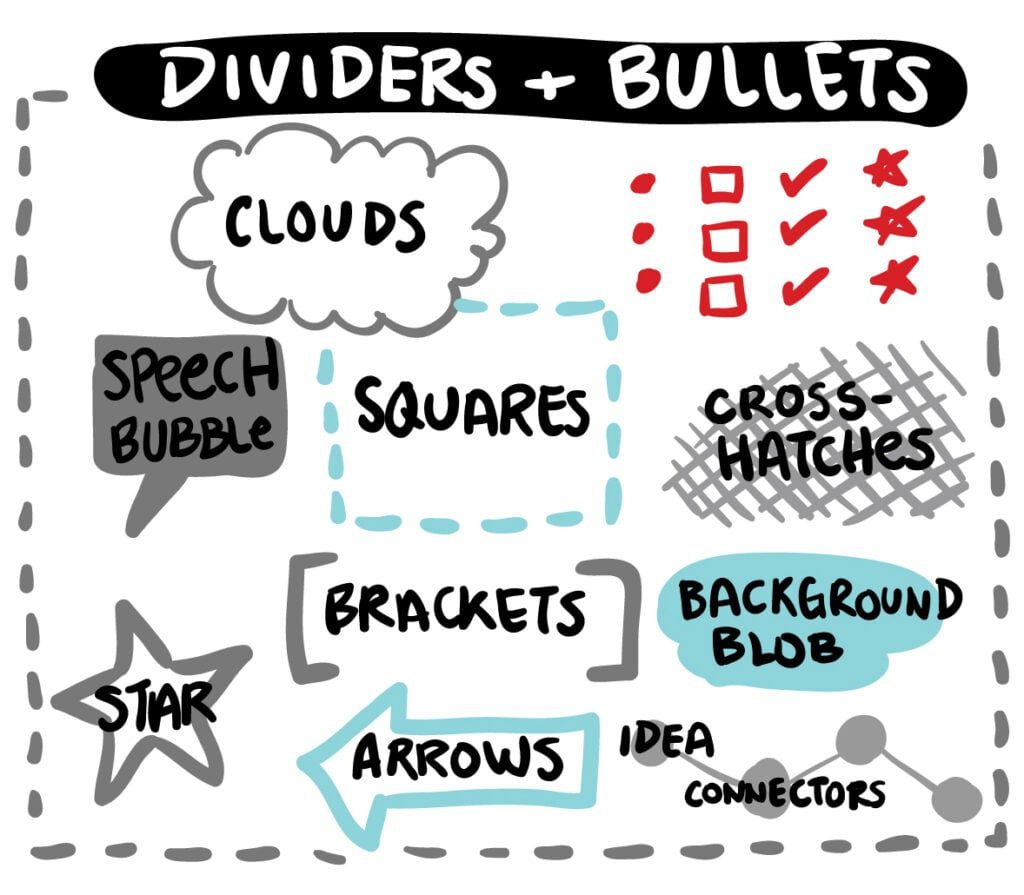
Bullets anchor each idea on the page and guide the reader’s eye. Keep your bullets consistent (don’t mix stars, boxes, and check marks all on the same page!), and avoid using bullets that match the colour of your Main Text — the bullets should stand out to avoid being confused for text.
Dividers
Where bullets help anchor each idea, dividers separate your content across the page. Dividers encircle each Header, its Sub-Headings and Main Text, in unobtrusive colours like pastels and grey tones. Consistency in your use of dividers will help keep your notes organized.
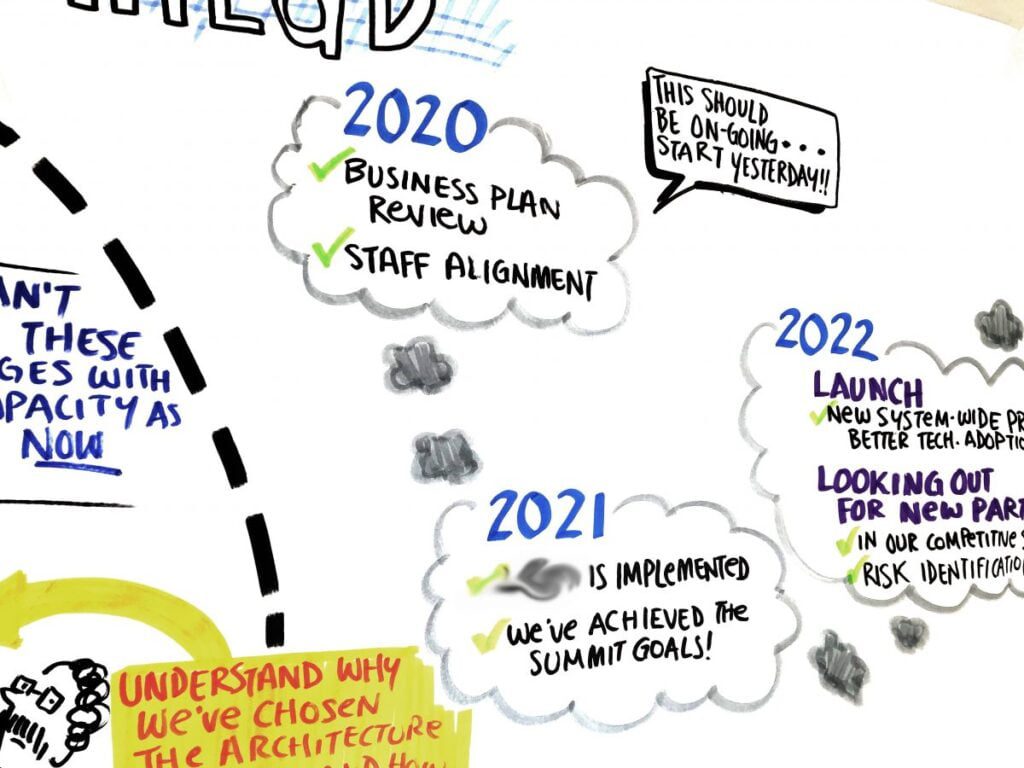 Clouds used to divide a timeline (note: confidential info removed or blurred)
Organizing Content
There are a myriad of ways of organizing content in flip chart note taking — below are a few basic examples. The Data Visualization Catalogue is also an excellent resource categorizing different ways of organizing information.

Lists
The most basic way of structuring your content is through bullet lists. Lists work well on any note taking layout – from flip charts to visual templates to sketch-notes!
Clusters
A more “organic” style of list, clusters allow you to add ideas wherever they fit around a main Heading or Sub-Heading. You can also use sticky notes to cluster initial ideas before committing them to paper.
Mind Maps
Mind maps can be used when a group is brainstorming around one topic. They’re best used on larger paper, as flip chart paper is a bit small, and are effective at helping the group see a “big picture” of ideas and think of branches off ideas.
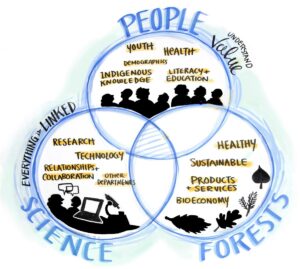
Venn Diagrams
Venn diagrams are effective when you want to demonstrate the relationship or overlap between different concepts. They’re best used when the main topics are identified and the group is discussing the relationship or opportunities between the topics.
Combinations
If you’re populating a large sheet of paper, you can utilize a combination of content organizers depending on the flow of the discussion. Maybe you start out by capturing ideas in a List, then move on to discussing the relationship between two of the ideas in a Venn Diagram.
Synthesis
The core skill of organized flip charts is synthesis. This means not capturing everything you hear, but recognizing when an idea has already been said (often phrased in a slightly different way) and not duplicating items you capture.
Synthesis requires you to pause and listen to the group, rather than rushing to take notes word-for-word. This not only results in more organized notes, but also gives the group time to slow down and consider each idea. It facilitates better discussions if you’re listening and clarifying each idea before adding it to the flip chart or visual template. If someone suggests an idea that’s already written, but maybe phrased slightly different, it’s an opportunity to dig deeper and ask how their idea is different from the one already captured. Maybe there’s more to the idea that needs to be teased out.
As an example of synthesis, let’s say you’re capturing a group conversation about a New Dog Park. People start to share their ideas, which don’t follow a linear pattern or organization:
1. “The park needs clearly marked garbage disposal”
2. “Why did we choose this location? It’s not easily accessible.”
3. “Can we have dog poop bags available?”
4. “Grass becomes muddy in rain, let’s consider a fine gravel base.”
5. “Who is responsible for maintaining the park?”
6. “Is there a website with information about the park?”
When you’re capturing ideas, think about how they might be categorized and start putting up general headings. Synthesize what was said so you capture concisely, rather than verbatim:
Maintenance
- Assign park maintenance responsibility (quote # 5 above)
- Signage for garbage disposal (quote #1)
- Dog poop bag station (quote #3)
Design
- Fine gravel base – not grass (quote #4)
Planning and Communication
- Purpose of location choice (quote #2)
- Accessibility (quote #2)
- Web page for dog park information (quote #6)
As more ideas start coming up, you can add more Headings if needed, or add the ideas to Headings that already exist. You might also make Sub-Headings under each Heading:
Maintenance (the Heading)
Dog Poop Clean-Up (Sub-Heading)
- bags available
- signage
- staff monitoring
Vandalism (Sub-Heading)
- signage with phone number
- monthly or bi-monthly clean up
- hire a street artist to create a mural
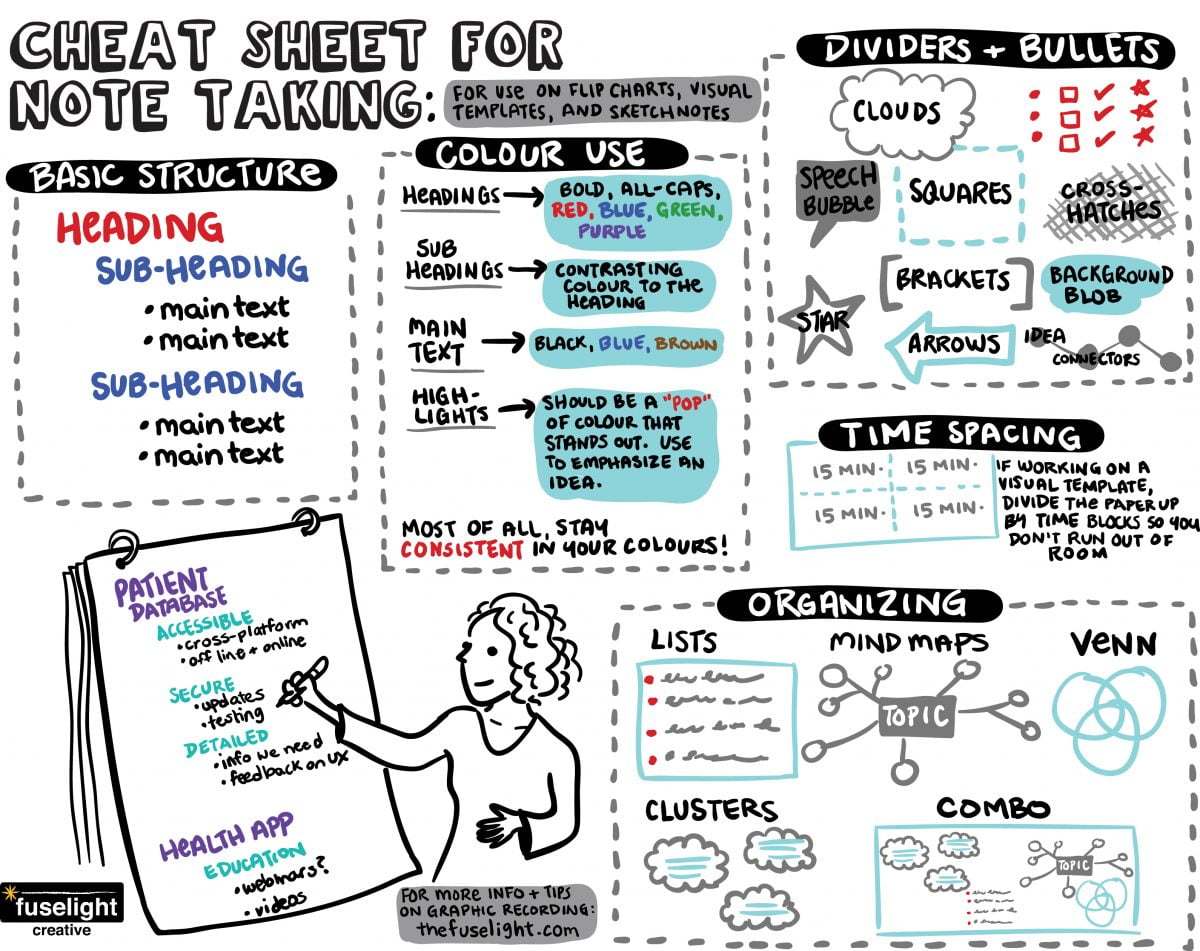
Cheat Sheet for Flip Chart Note Taking
It takes practice and time to hone your flip chart note taking. Group discussions can be fast-paced, so don’t expect that you’ll be able to implement all these techniques in the moment. Focus on gradual improvement — start with legible hand writing and planning your paper space before moving on to other techniques.
The cheat sheet below is a summary of the basic tips for better flip chart note taking. Keep it handy as a print out or digital copy to review prior to capturing a group discussion!
")